
Building an ADU for an aging parent often starts with a simple goal: keep family close while giving everyone their own space.
The layout should support the person who will live there, including how their needs may change.
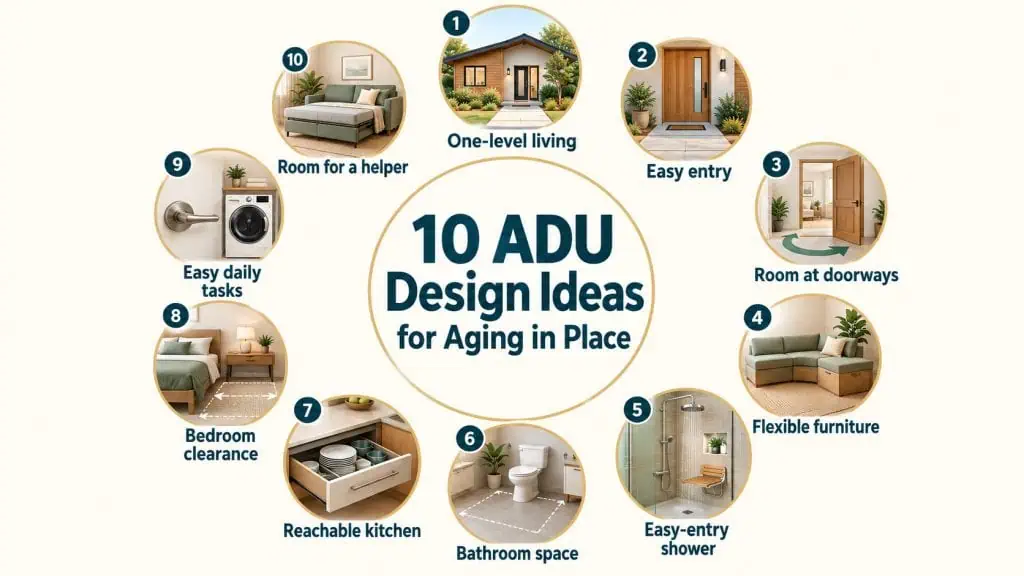
These ADU design ideas for aging in place are also worth considering if you’re building for yourself, creating a rental, or planning a backyard home for future family use.
Aging in place means continuing to live in your home as you grow older. Thoughtful design can support that goal, though a floor plan alone cannot meet every future care need.
You may not need a walker, seated shower, or overnight helper today.
Thinking through those possibilities before construction gives you more choices and can save money for future needs changes.
- An ADU designed for aging in place should make everyday tasks easier and leave room for changing needs.
- Prioritize one-level living, easy entry, clear pathways, usable bathroom space, and reachable storage.
- Test the floor plan with actual furniture and consider where someone could stay to help.
Disclosure: This post may contain affiliate links, meaning I can earn commissions. If you decide to purchase through my links, it is at no cost to you.
Why Design an ADU for Aging in Place if you don’t need it?
Designing today for aging in place gives you more options as needs change.
An easy entrance, reachable storage, and room to move can help an aging parent, someone recovering from surgery, or a future resident.
Planning these features before construction can also reduce the need for difficult changes later.
Plus is saves money and usually does not cost a lot more to plan ahead.
You don’t have to predict every future need. Start with the person who will live there, consider their daily routines, and leave flexibility where you can.
1. Keep Everyday Living on One Level
Start by asking whether someone could handle a normal day without using stairs. That includes getting out of bed, taking a shower, preparing meals, and doing laundry.
If one of those tasks requires going upstairs, think about whether the layout would still work during recovery from surgery or a change in mobility even if they are still quite young.
A loft can provide extra storage or occasional guest space. I would treat it as a bonus rather than a room the resident must use every day.
The main floor should function as a complete home on its own if you do happen to have a sleeping space upstairs.

The same thinking applies to laundry. A downstairs bedroom does little to simplify daily life if the washer and dryer sit in another building reached by steps.
Before choosing a type of ADU, consider how its location and layout will support everyday routines.
An upstairs garage apartment may suit one household, while a ground-level unit may better fit another for the majority of future tenants.
If there is now way around a 2nd story ADU option, then consider adding a lift or elevator.
2. Plan an Easy Route From Parking to the Front Door
The entrance starts where someone gets out of the car. Follow that route all the way to the door.
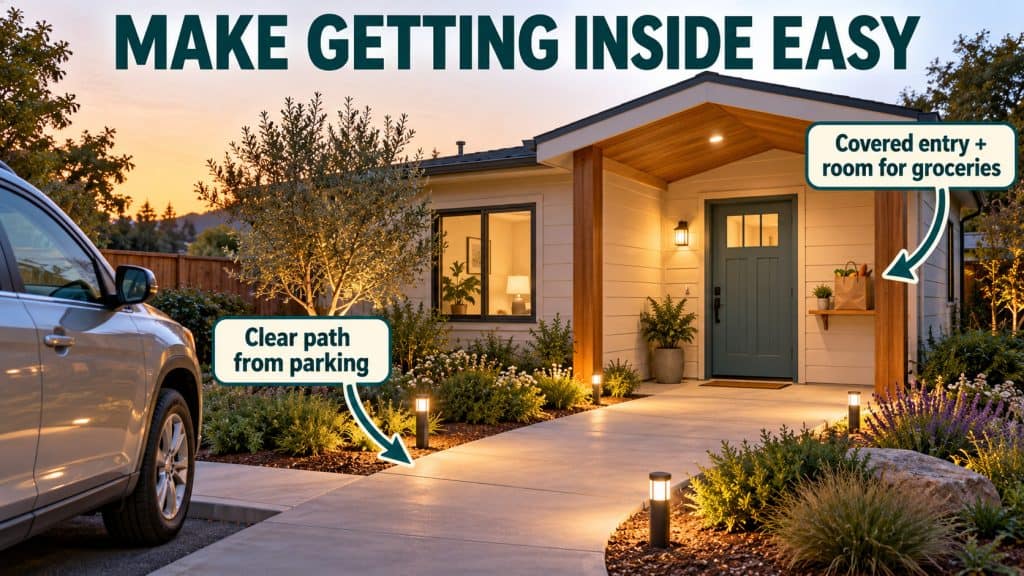
Look for uneven surfaces, narrow passages, steps, poor lighting, and places where water might collect.
A smooth, firm pathway can make the trip easier with groceries, a rolling suitcase, or a mobility device.
A covered entry also gives someone time to unlock the door without standing in the rain. Include a convenient place to set down a bag without blocking the entrance.
Pay attention to the transition through the doorway, too. A raised sill can create an obstacle, but the solution needs to work with the door’s weather protection and the site’s drainage.
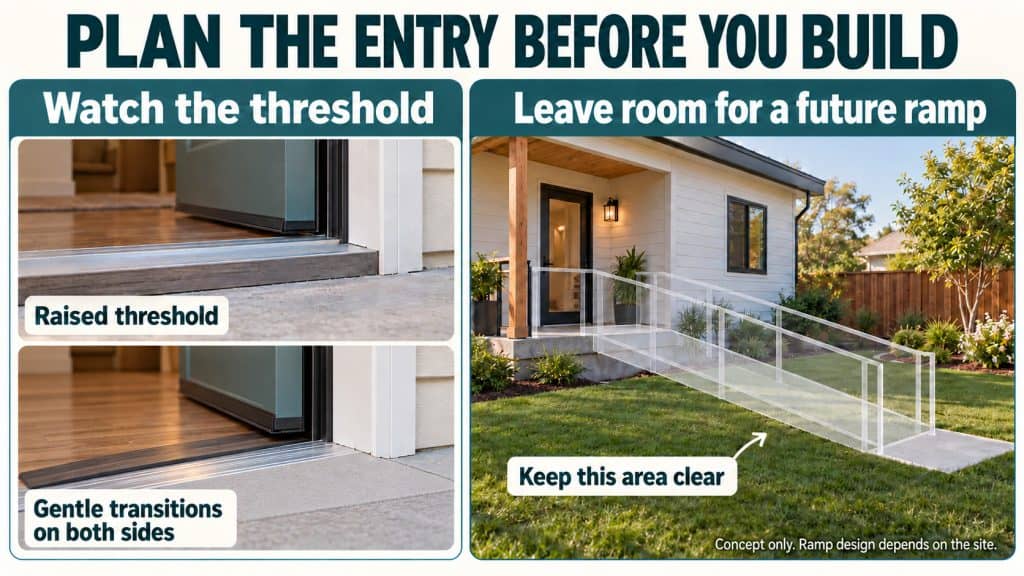
A gently sloped transition may be an option to accommodate for any needs in the future where wheels have to move over easily.
Have the designer address the entry as a complete system rather than adding a small ramp without considering where water will go.
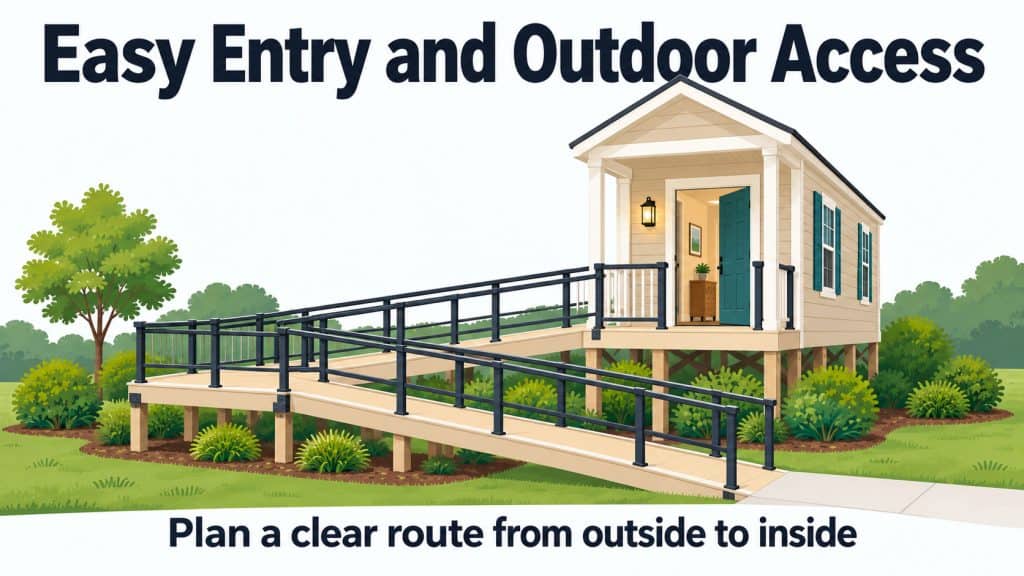
If a larger ramp might be needed later, identify where it could fit.
A ramp may require more space than expected, including landings and room to turn.
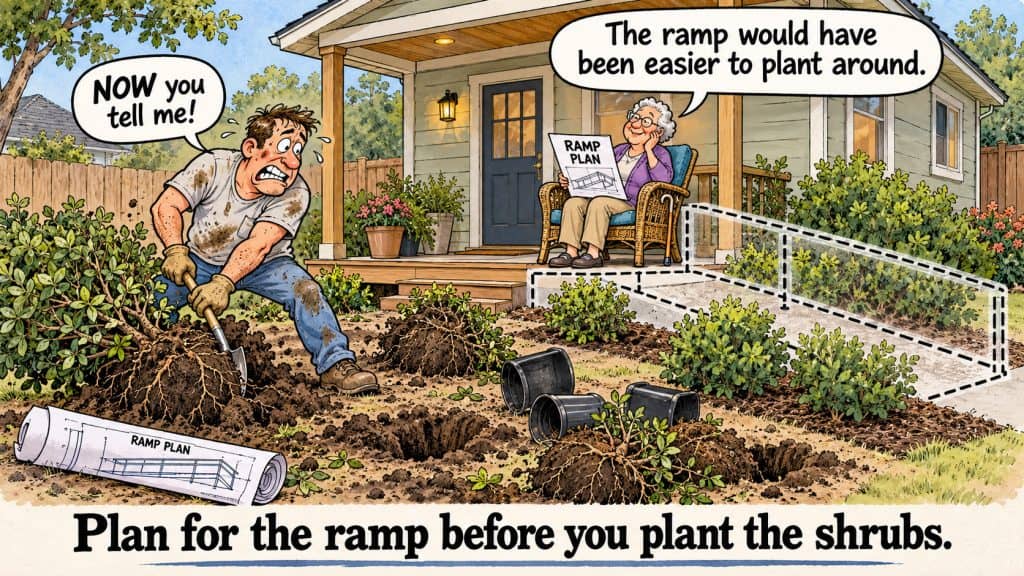
Landscaping, fences, and the ADU’s position can limit those options and be a pain to have to dig up later.
AARP’s HomeFit guide recommends planning for at least one step-free exterior entrance where possible.
3. Look at Door Approaches, Not Just Door Width
A doorway may look generous on a floor plan and still be awkward to use. What happens immediately before and after the opening matters.
Picture approaching a bathroom from a narrow hallway and making a sharp turn through the door.
Someone using a walker or wheelchair needs room to line up, turn, and pass through.

Nearby furniture, a wall, or the door itself can complicate that movement.
A straight approach may simplify the route. In some layouts, a diagonal doorway can open up a tight corner.
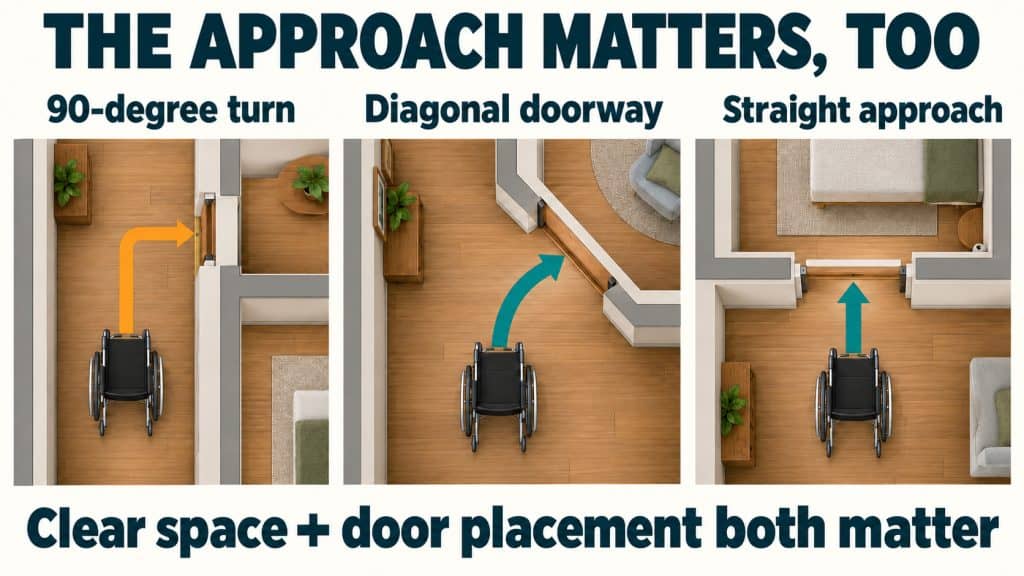
Neither arrangement solves every problem, so evaluate the doorway and surrounding space together.
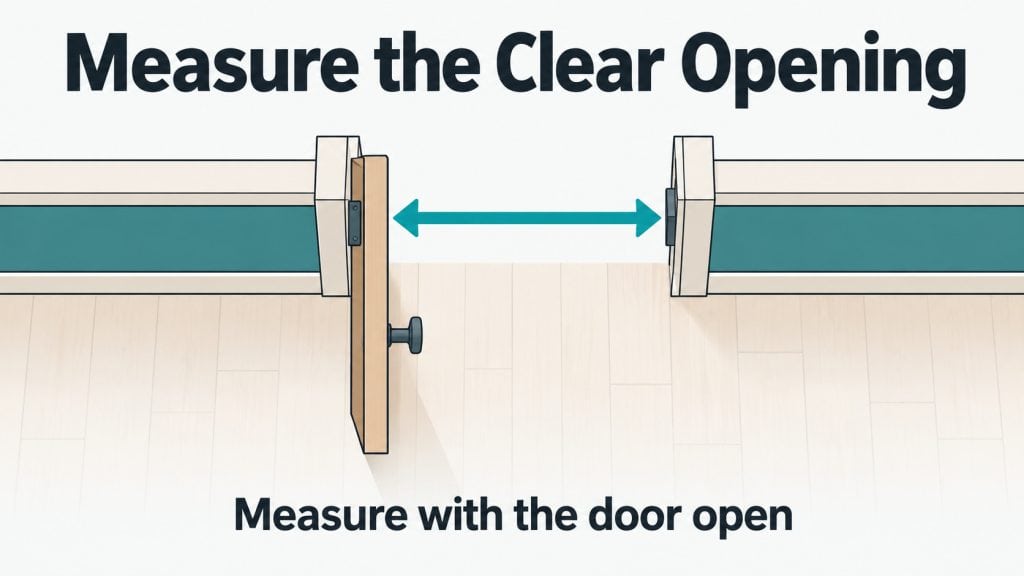
Ask your designer to check the actual clear opening with the door open, along with maneuvering space on both sides.
The door’s advertised size does not tell the whole story.
4. Test the Floor Plan With Your Actual Furniture
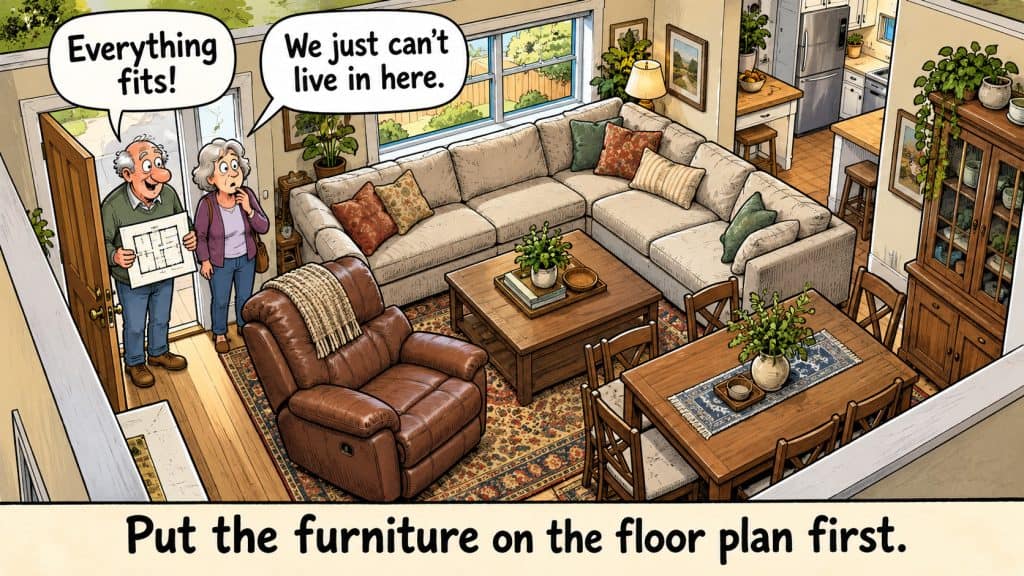
An empty room can look spacious. Add a bed, sofa, dining table, and chairs, and the pathways may tell a different story.
Put the dimensions of your actual furniture on the plan. Then check how the room functions when someone pulls out a dining chair, opens a drawer, or walks around the bed.
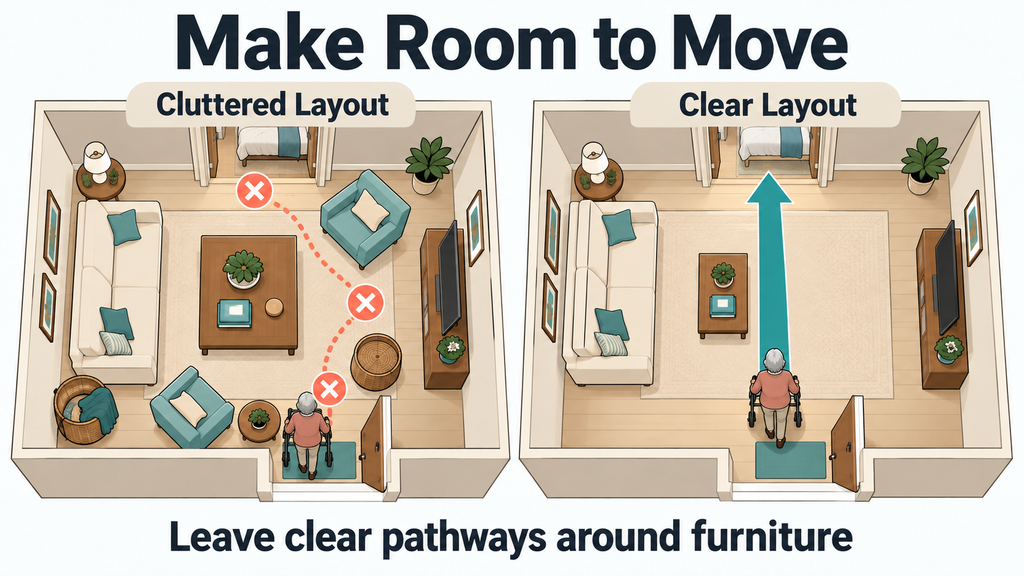
Consider where a walker could sit nearby without blocking the route.
Kitchen islands deserve a close look. They offer useful preparation space, but a fixed island can create a bottleneck.

A movable prep island with locking casters may give you flexibility, provided you have a practical place to move it.
This works best with a freestanding work surface rather than an island containing plumbing or cooking equipment.
In the living area, compare a sofa with two chairs.
Neither is automatically the better choice. Furniture size, placement, seat height, and ease of getting up all matter.
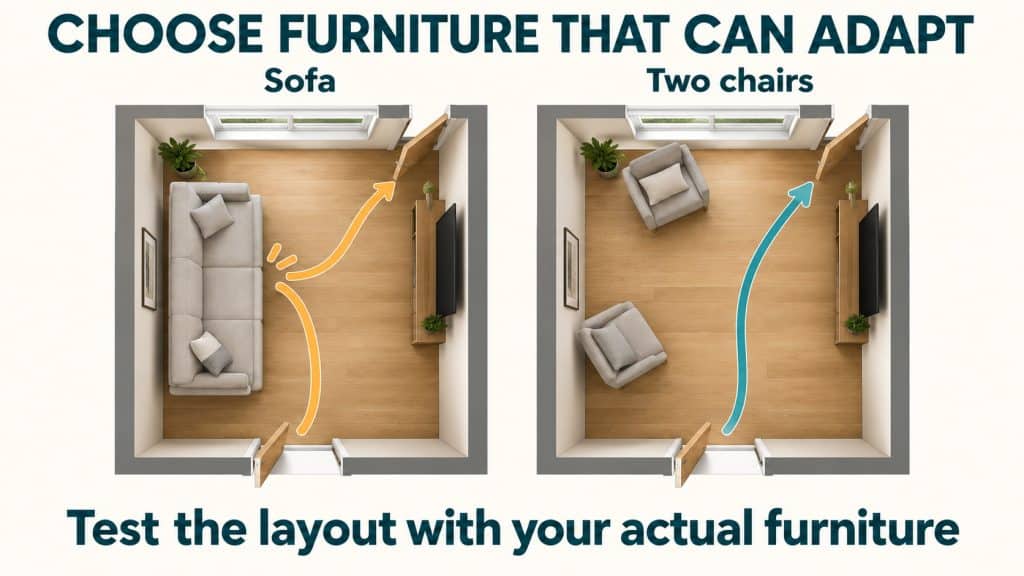
Modular seating offers another option. You might join four pieces as a sofa, divide them into two smaller seating groups, or separate them as the room’s needs change.
Check whether the pieces are manageable to move and supportive enough for the resident.
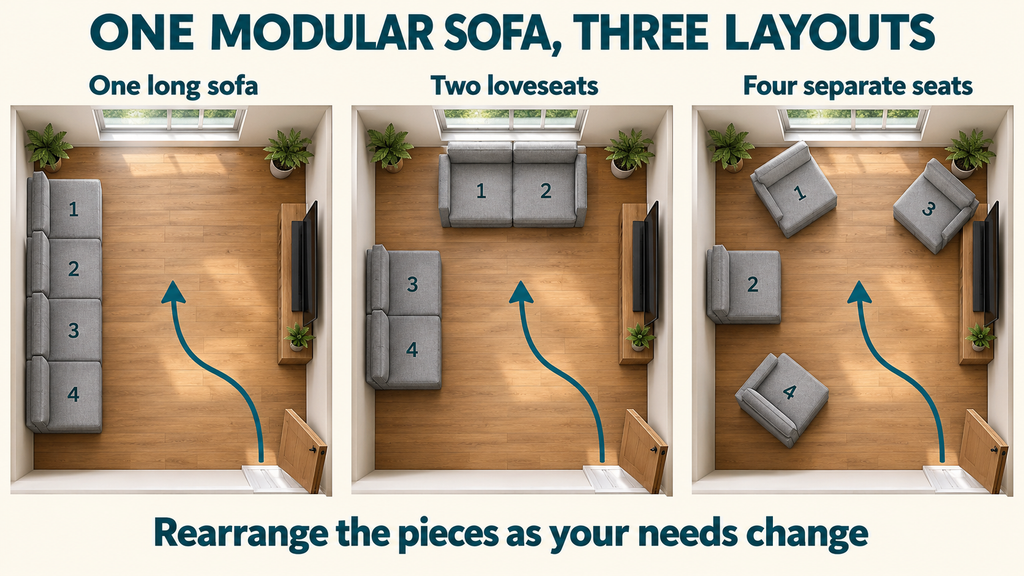
Your goal is to keep the furniture you need while preserving useful movement space. These choices also connect with the broader ideas in my guide to optimizing space in an ADU.
5. Make the Shower Easier to Enter and Use
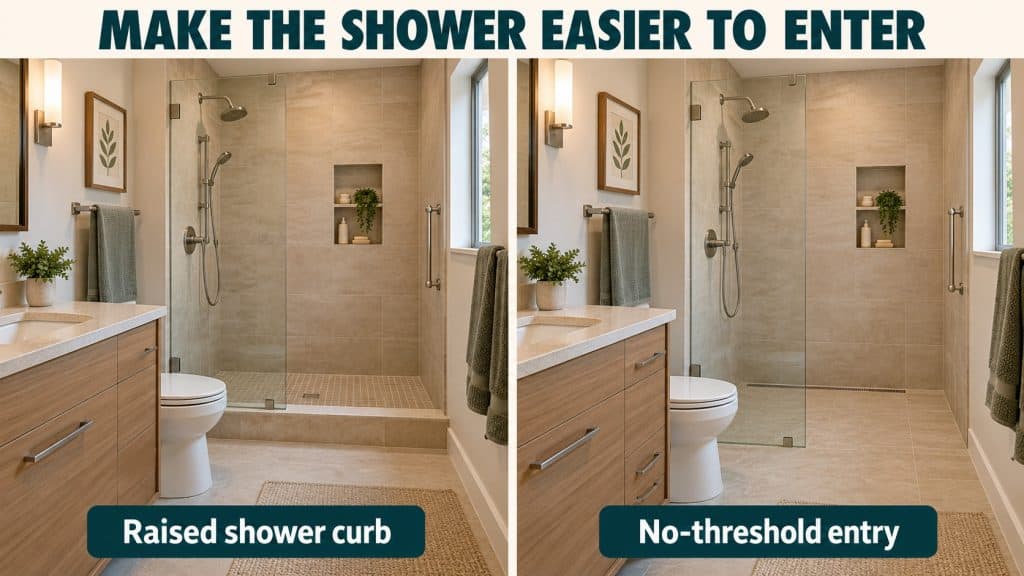
A shower curb may seem like a small detail until stepping over it becomes difficult.
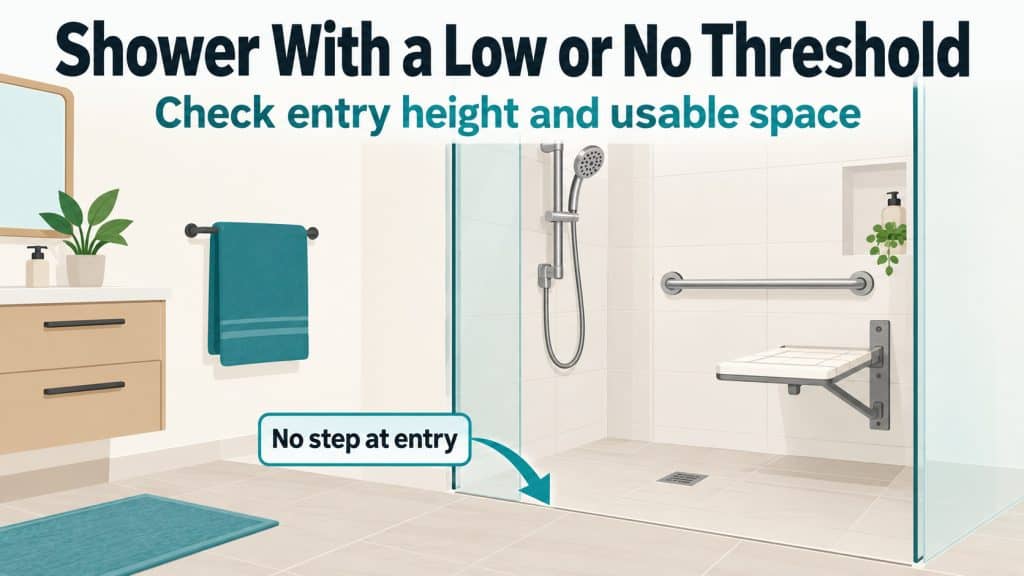
A low- or no-threshold shower is worth discussing during the design stage, when the floor structure, drainage, and waterproofing can be planned together.
Think beyond entering the shower.
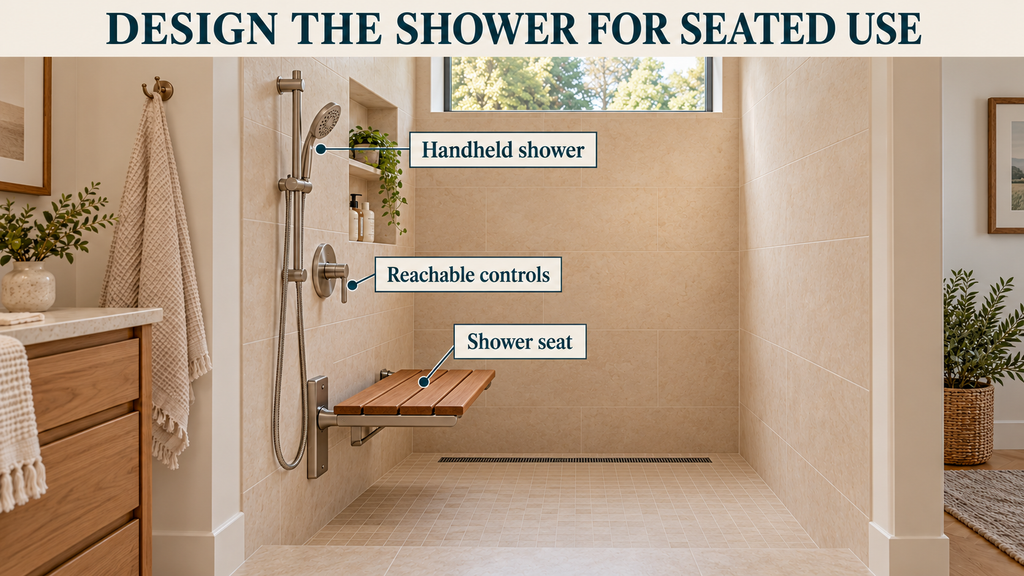
Consider where someone could sit, how they would reach the controls, and whether they could use a handheld shower without standing up.
A shower seat works best when the surrounding features support seated use. Controls placed across the shower may be convenient while standing but awkward from the seat.
Position the seat, handheld shower, controls, and storage around the person’s comfortable reach.
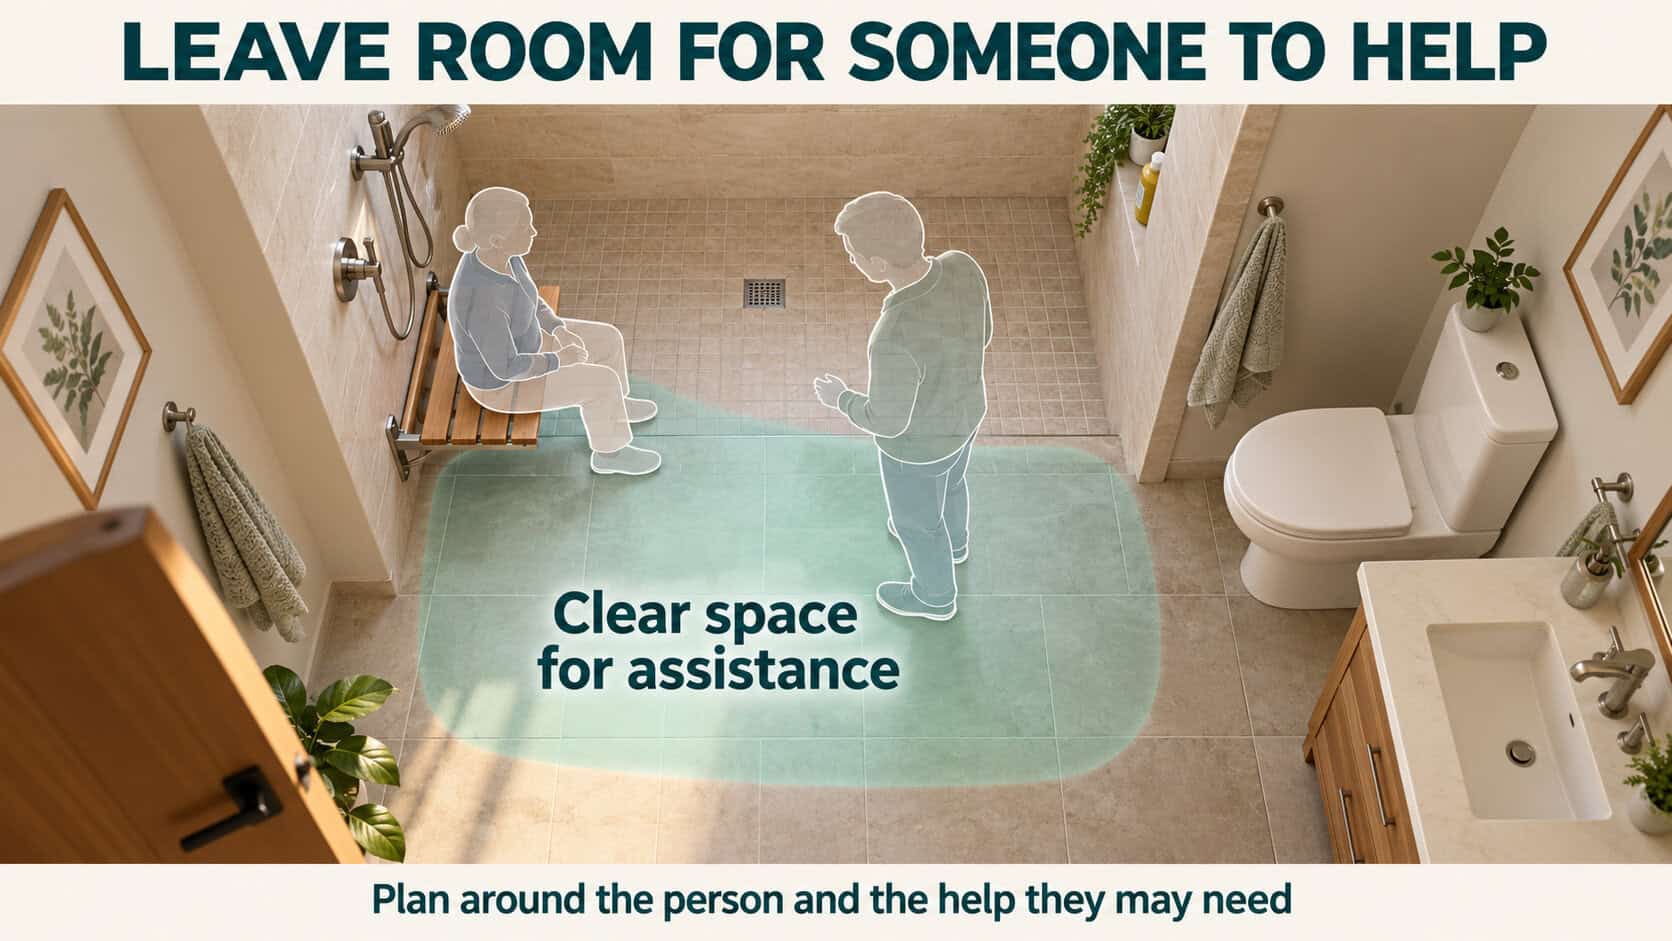
Leave room for assistance, too. A narrow opening or fixed glass panel may make it harder for someone to help.
Think about how a helper could stand nearby without crowding the resident or blocking the entrance.
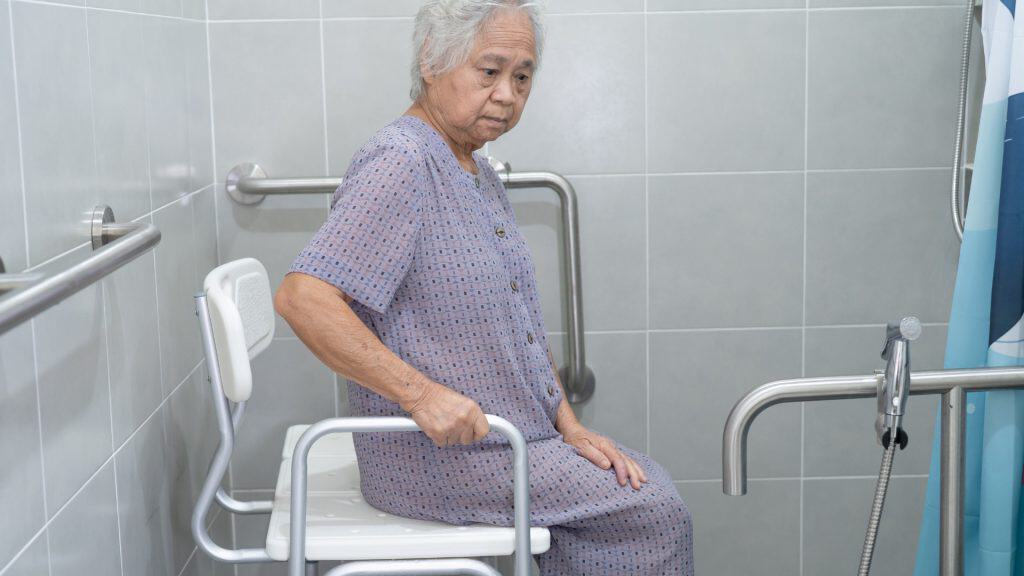
AARP’s bathroom guidance also discusses shower seating and properly installed grab bars as useful home features.
6. Give the Rest of the Bathroom Breathing Room
A bathroom can fit every fixture and still feel difficult to use.
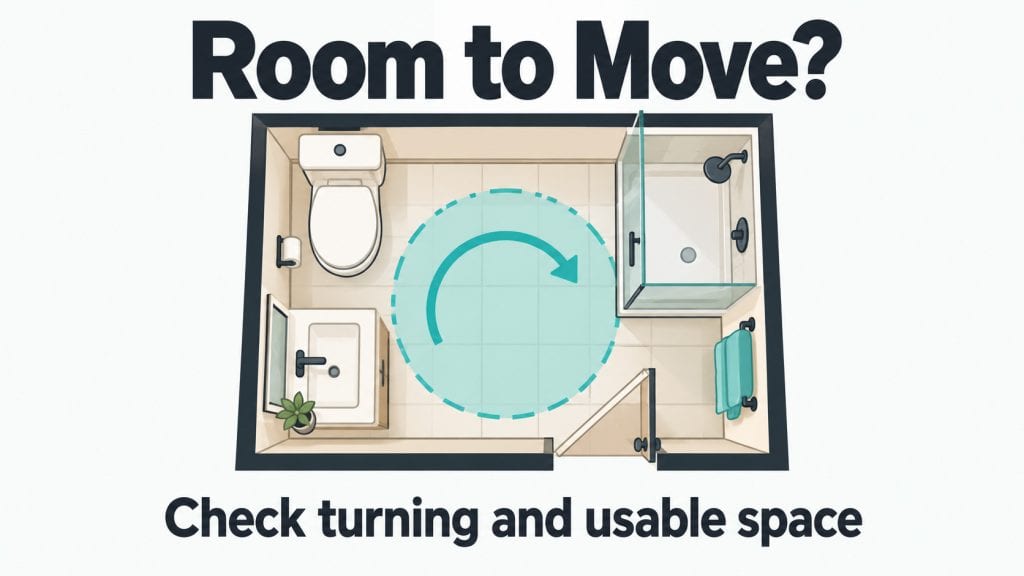
Look at the floor space beside the toilet, in front of the vanity, and between the doorway and shower.
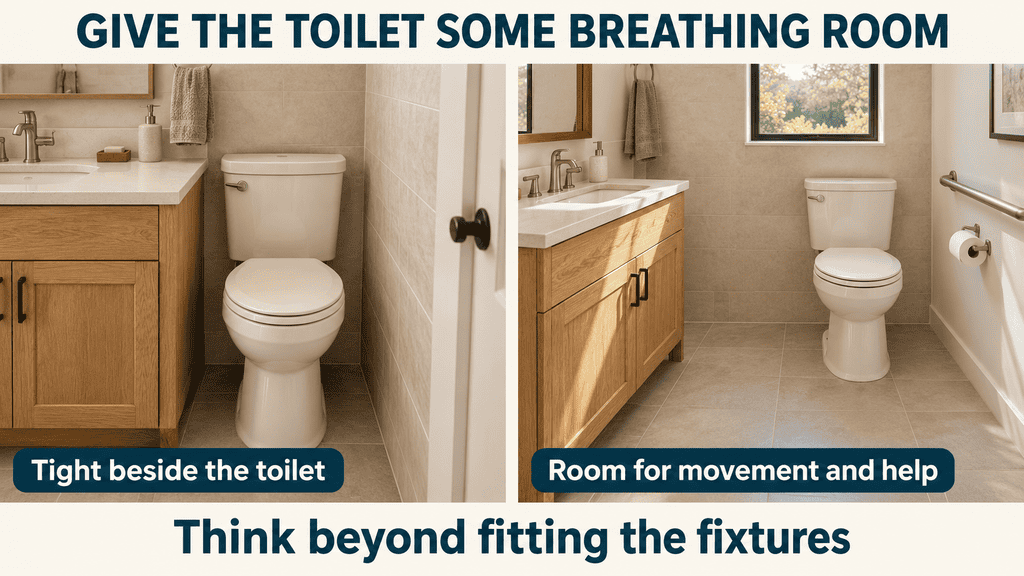
Could someone approach the toilet with a mobility device?
Is there room for assistance if needed?
Can the resident reach the sink without squeezing between fixtures?
Those questions help you judge the layout beyond its overall square footage.
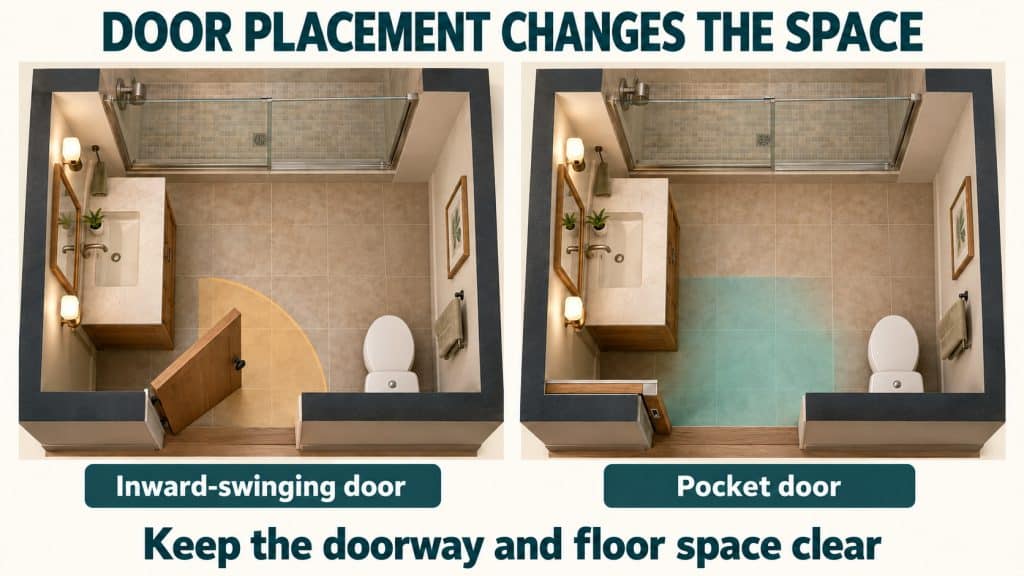
Door placement can make a noticeable difference.
An inward-swinging door uses floor space that might otherwise help with movement.
A pocket door can free that space, but check whether the resident can comfortably operate its handle and lock.
The wall also needs to accommodate the door pocket.
Consider how the bathroom could be accessed if someone fell near the entrance. Discuss that scenario with the designer when choosing the door arrangement.
Plan for future grab bars before the walls close.
Reinforcement inside the wall can provide suitable mounting support, but its placement needs to match where bars may be installed.
Photograph and document the reinforcement so its location is easier to identify later.
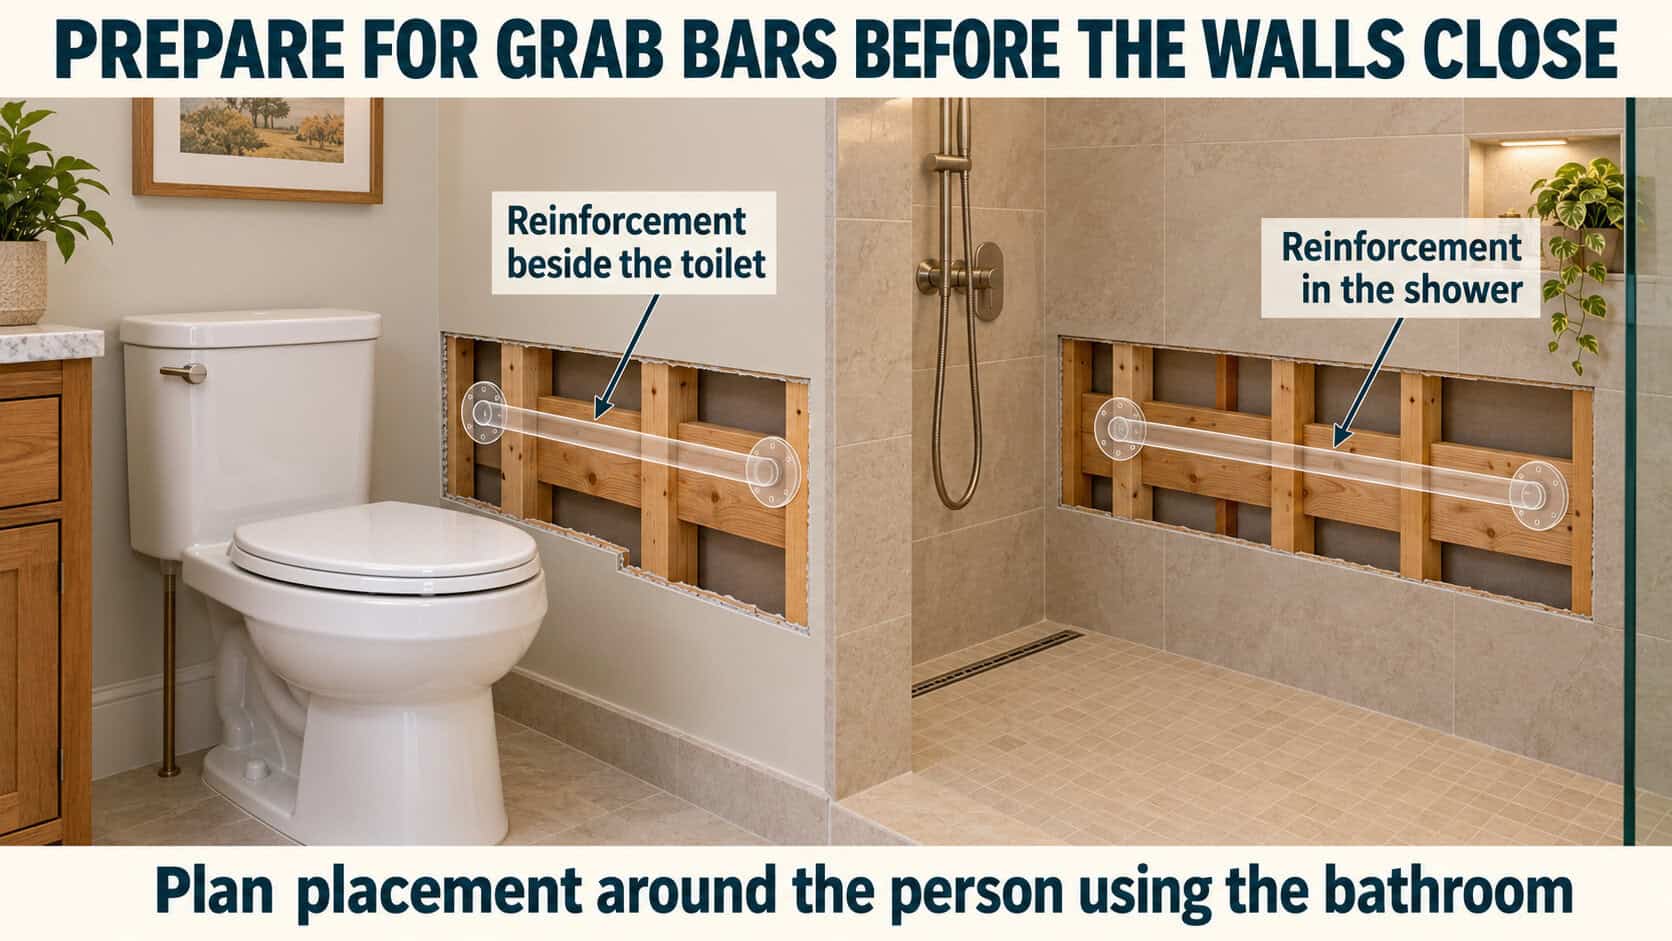
Choose grab-bar positions around the resident’s needs. A towel bar should never be assumed to provide the same support as a properly installed grab bar.
7. Put Kitchen Essentials Within Comfortable Reach
A useful kitchen lets someone reach what they need without repeatedly climbing, bending deeply, or digging through storage.
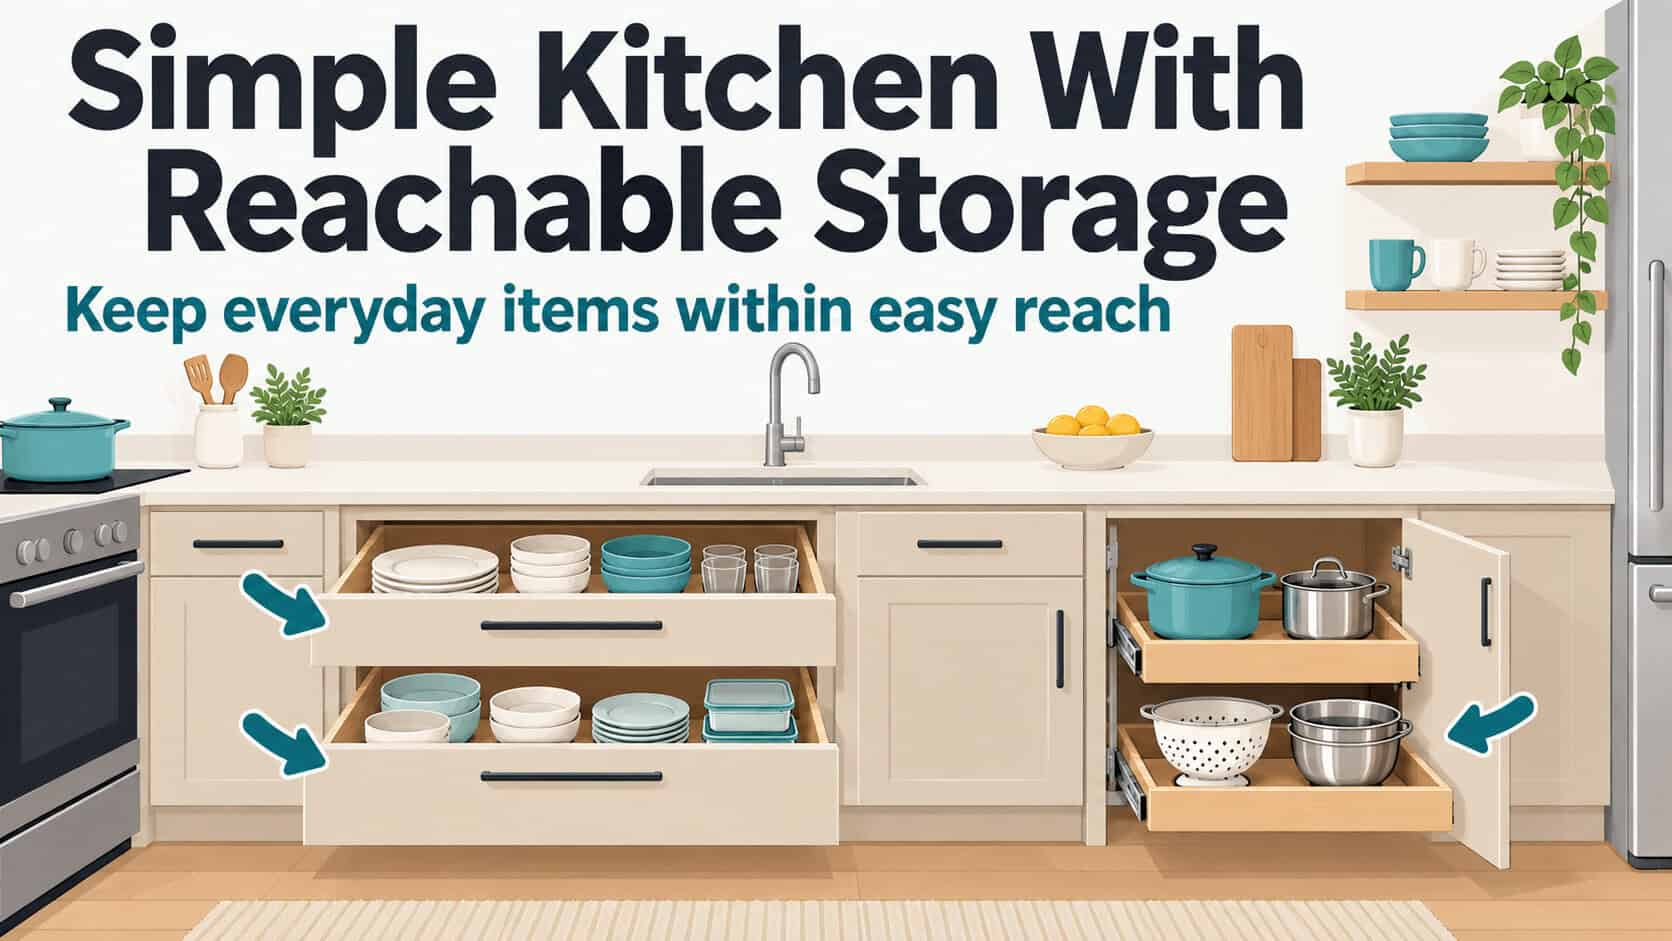
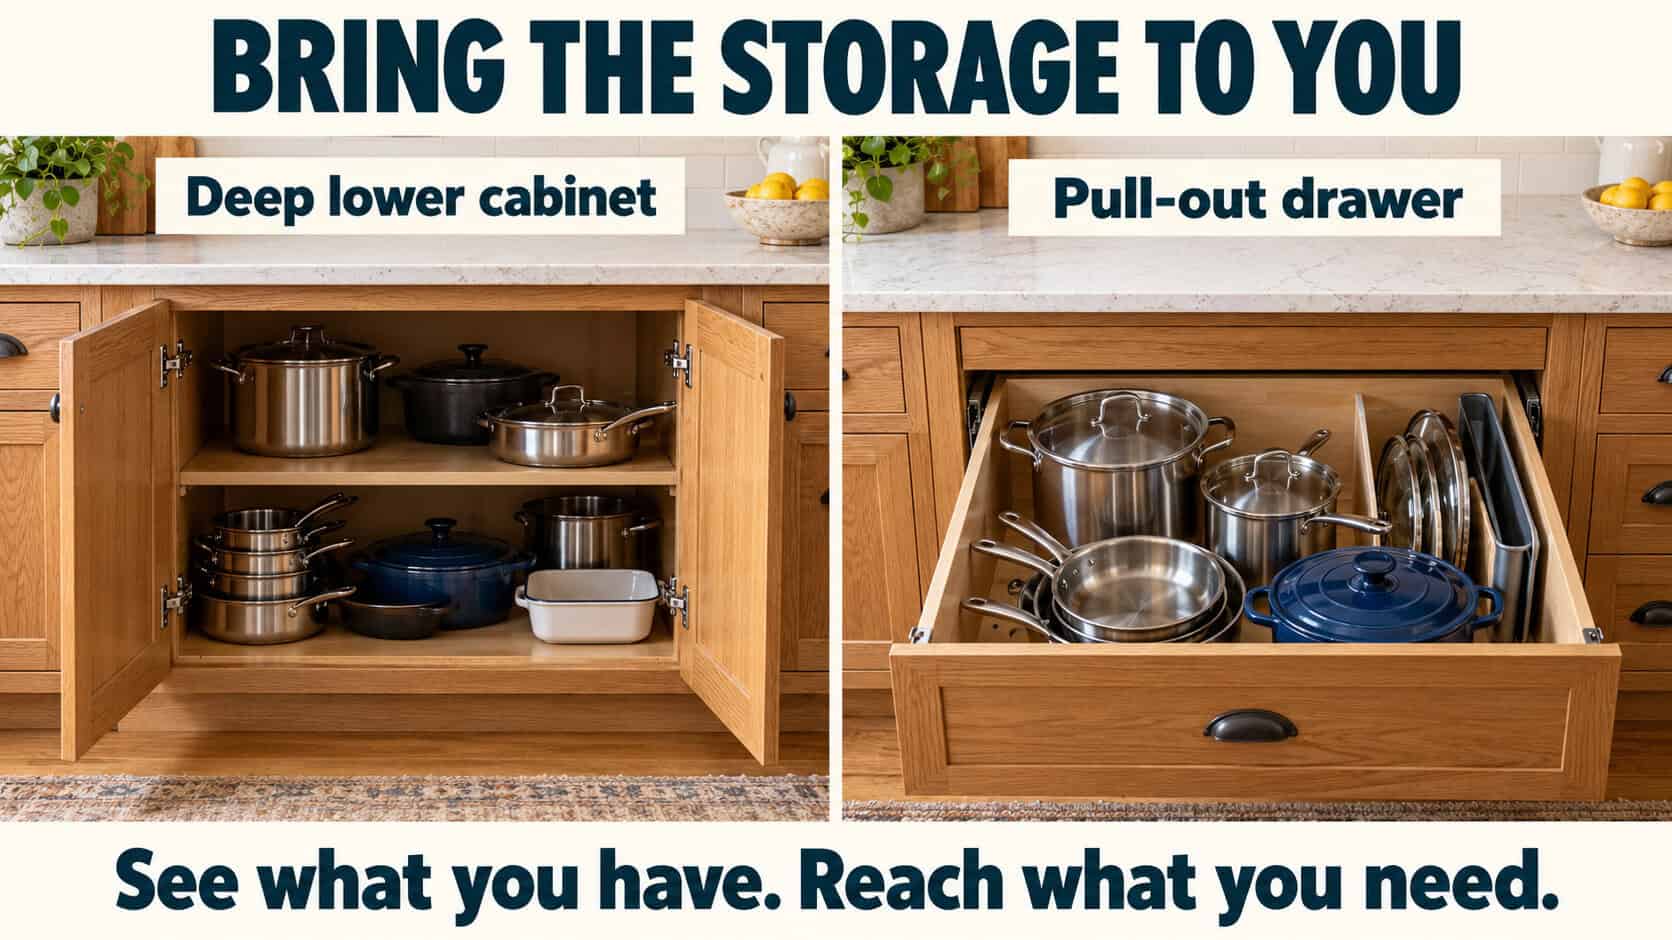
Deep lower cabinets can hide cookware at the back. Drawers and pull-outs bring those items forward, making them easier to see and retrieve.
Check the effort needed to open them, especially when loaded with heavy dishes or pots.
Organize everyday items around the resident’s reach. Dishes, frequently used food, and cooking tools should have convenient homes.
Reserve harder-to-reach areas for lightweight items used less often, with a plan for getting help when needed.
AARP’s kitchen-storage guidance includes options for improving access to items that would otherwise be difficult to reach.
Appliance placement matters as much as storage.
Think through the movement of taking a hot dish out of an oven or microwave and setting it down.

A nearby landing surface can make that task more manageable. Avoid choosing an appliance location based only on how neatly it fits the cabinetry.
A place to sit during food preparation can also help.
That might be a lower work surface with knee space or a nearby table at a comfortable height.
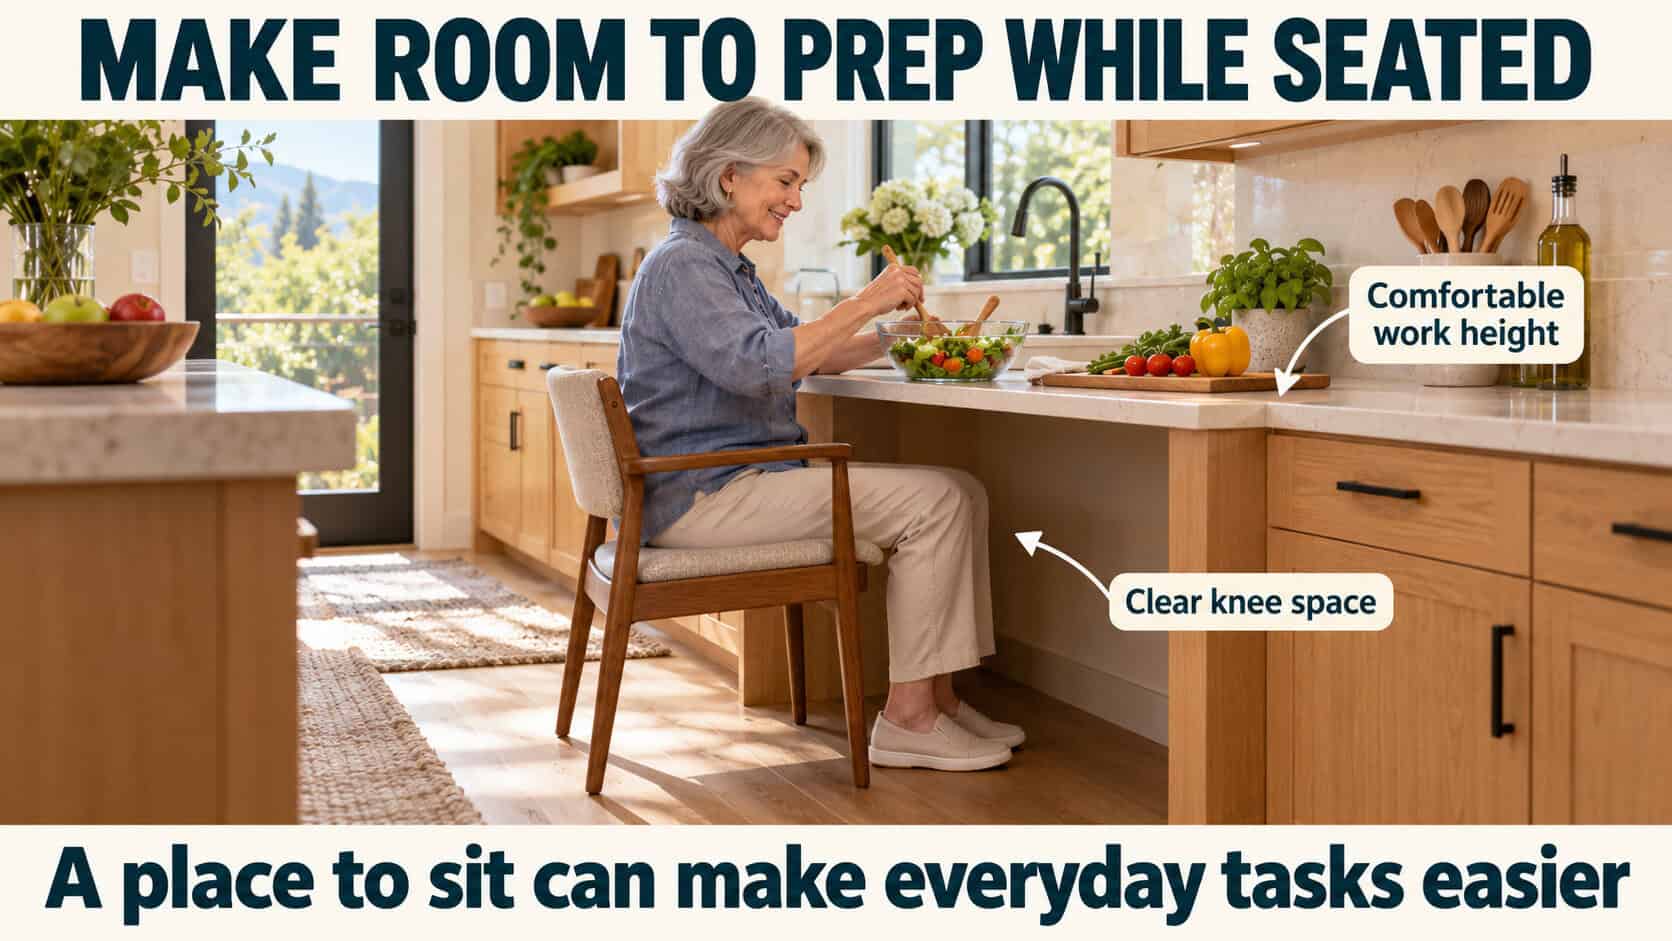
Check that the chair is stable and the resident can work without stretching across the counter.
8. Plan the Bedroom for Movement, Storage, and Nighttime Trips
Start with the bed the resident expects to use. A room that works with a twin bed may feel very different with a queen, especially after adding storage.
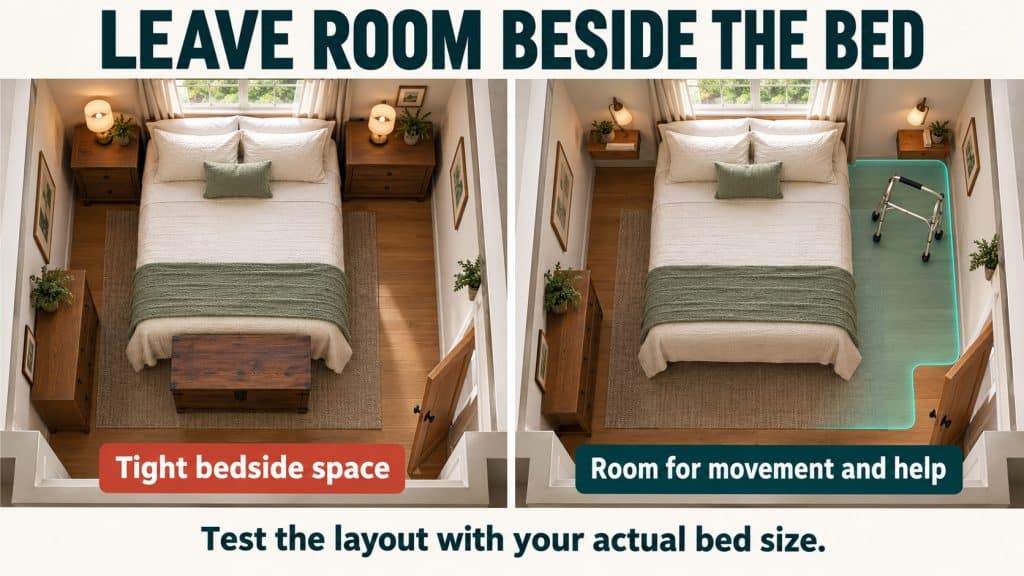
Check the space beside the bed and around its foot.
Consider where someone could stand to assist and where a mobility device could remain within reach.
Smaller bedside shelves may preserve more useful floor space than bulky nightstands.
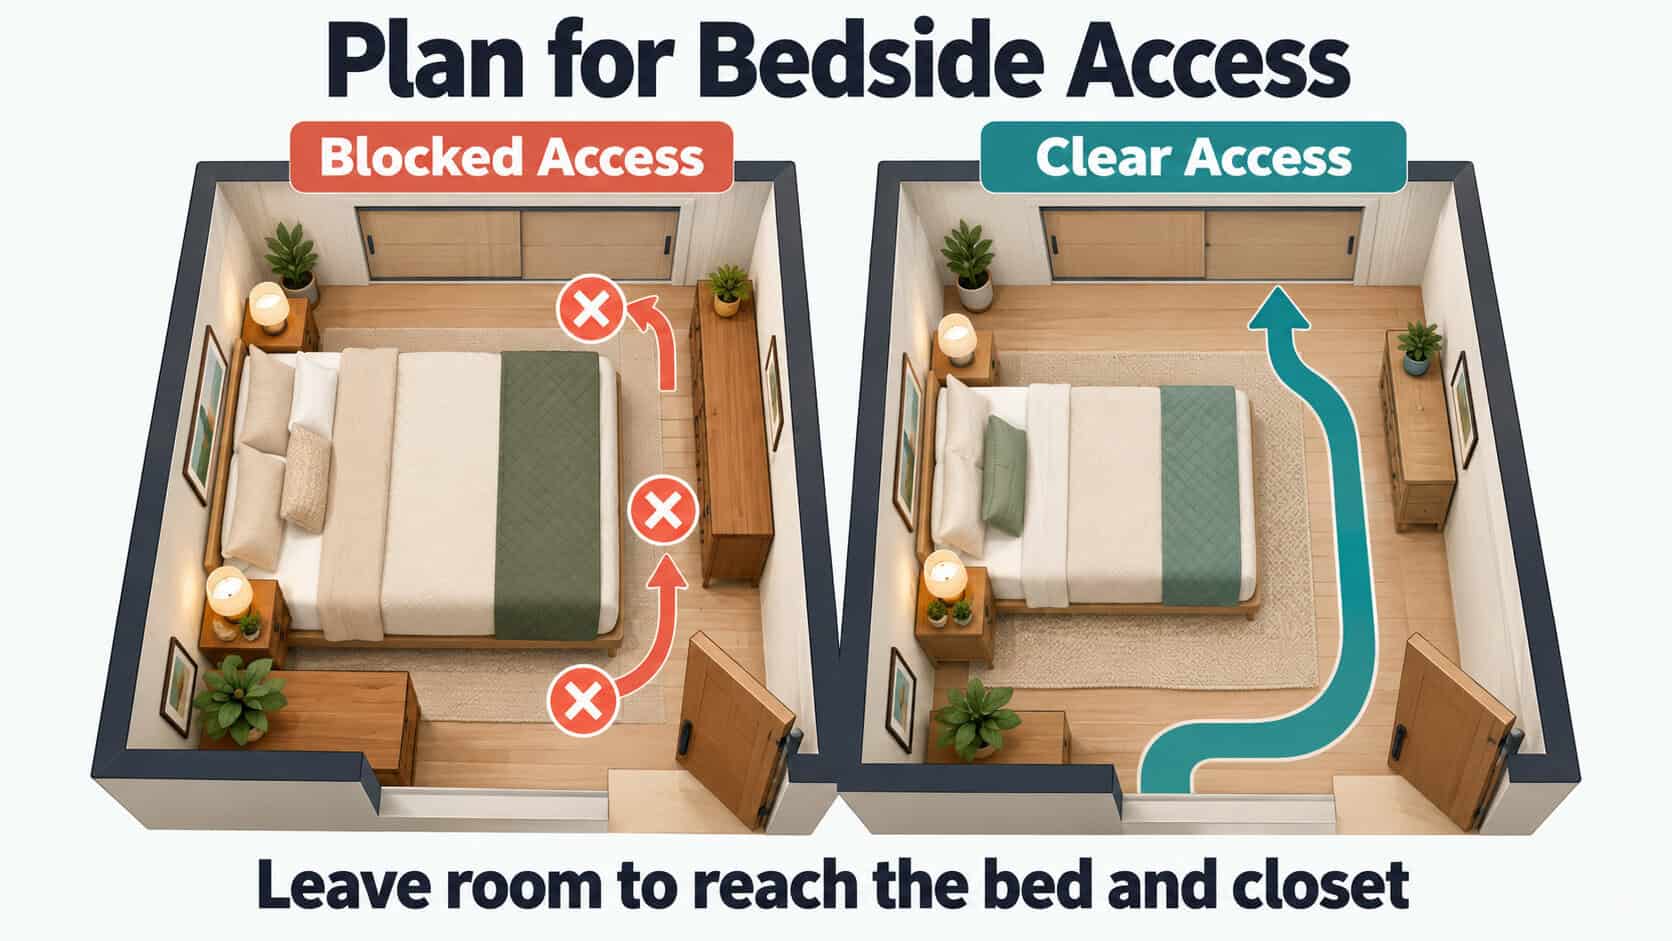
Next, follow the nighttime route to the bathroom. Keep it clear of cords, furniture, and loose items.
Plan lighting that helps someone see the floor and doorway without searching for a switch in a dark room.
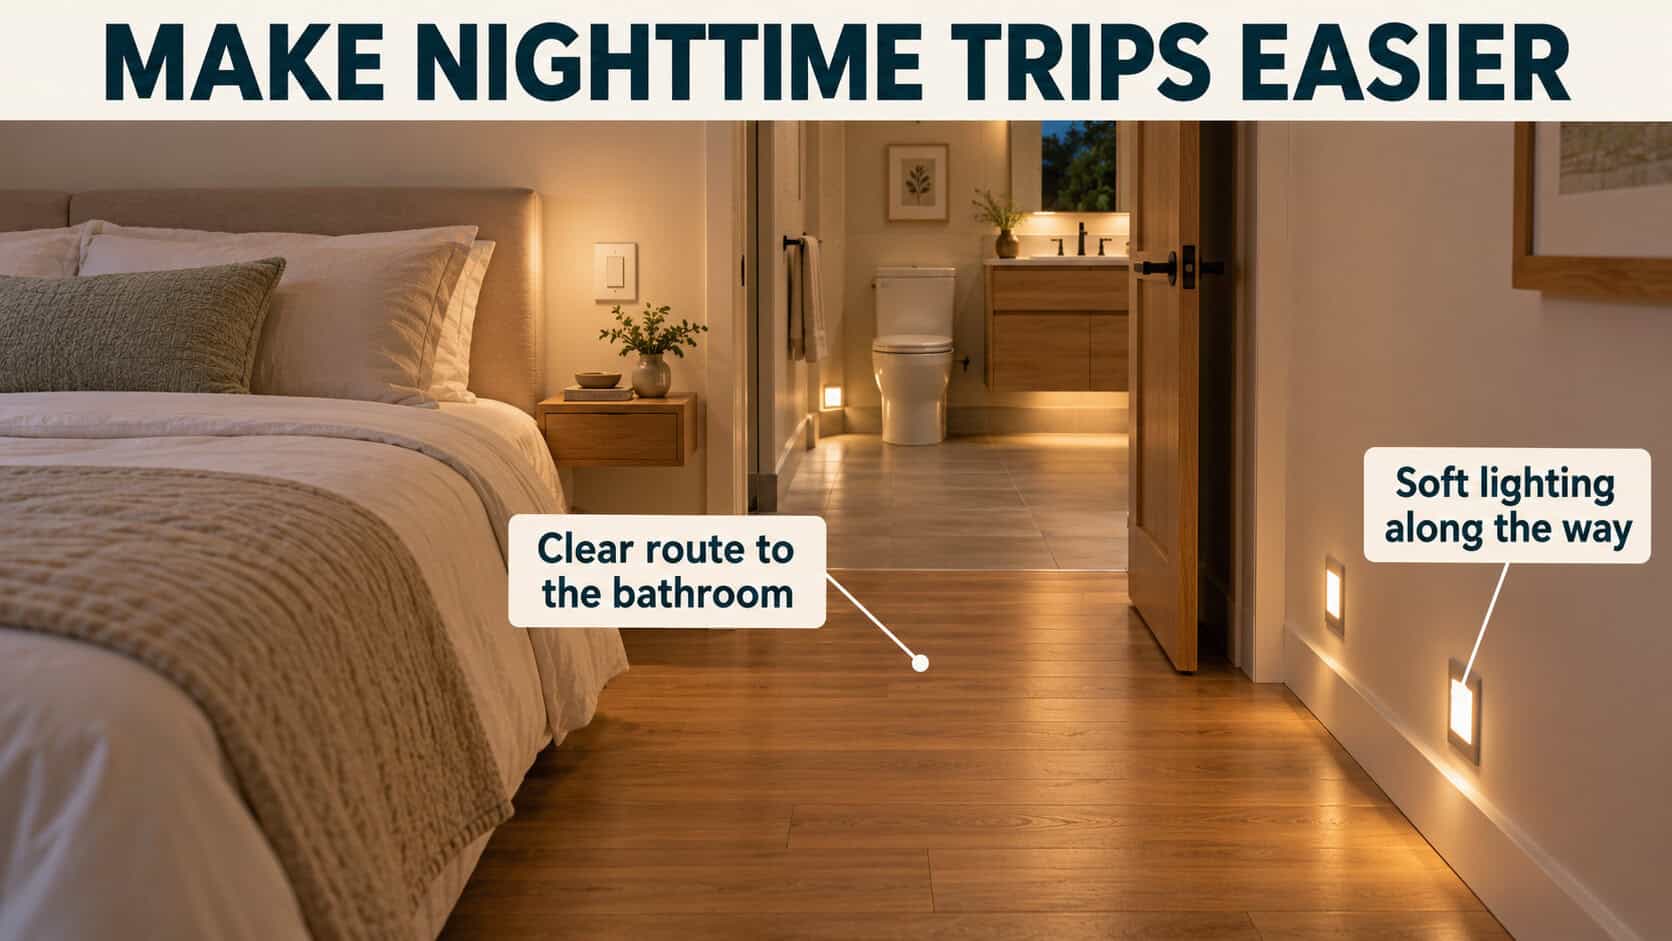
AARP’s lighting guidance encourages planning lighting and outlet placement around how people use the home.
Closet design deserves the same attention. Put everyday clothes within comfortable reach and check what happens when drawers open.
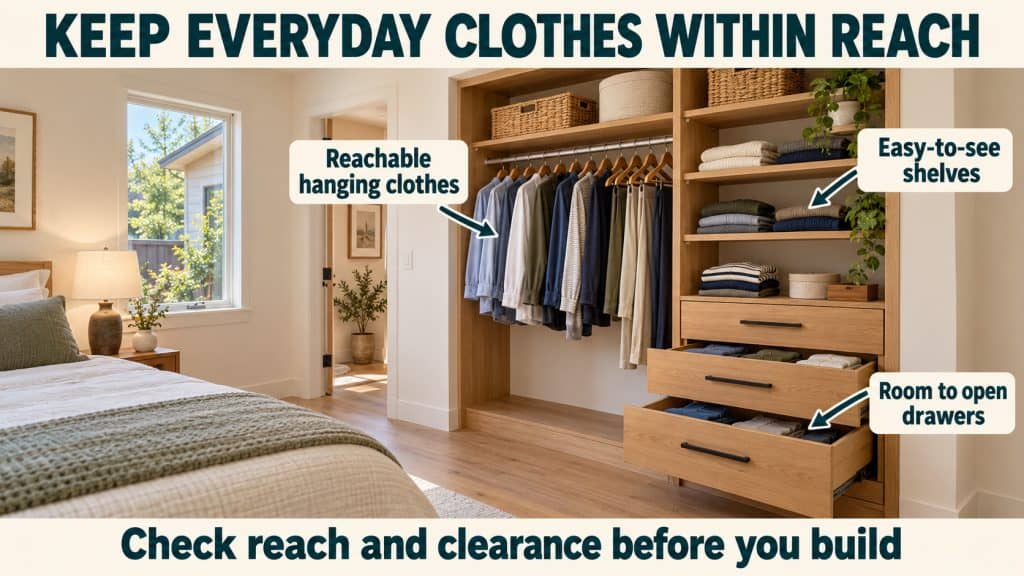
A closet can offer plenty of storage while still crowding the route beside the bed.
9. Make Everyday Controls and Laundry Easier to Manage
Small tasks can become frustrating when a home requires awkward reaching or tight gripping throughout the day.
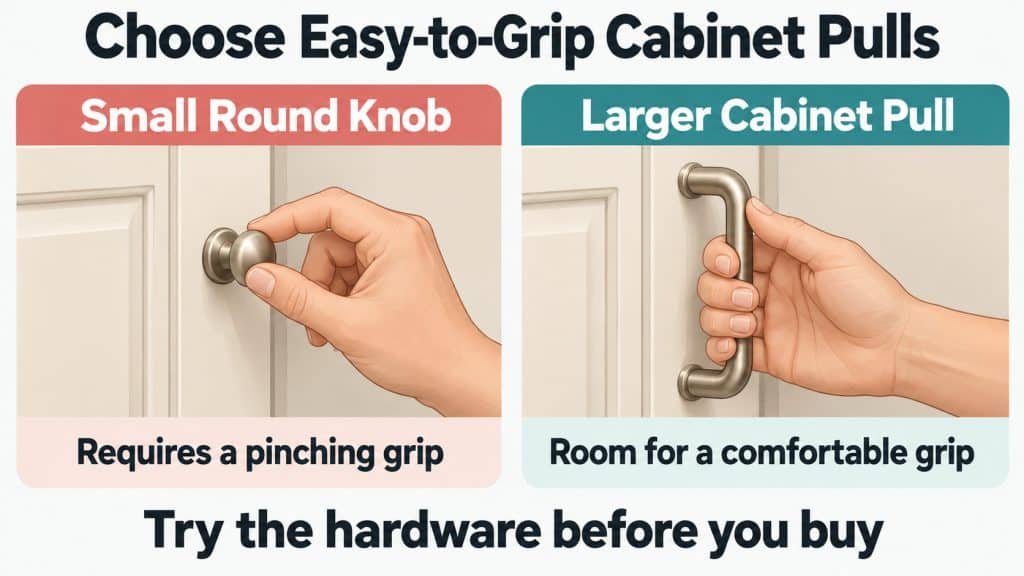
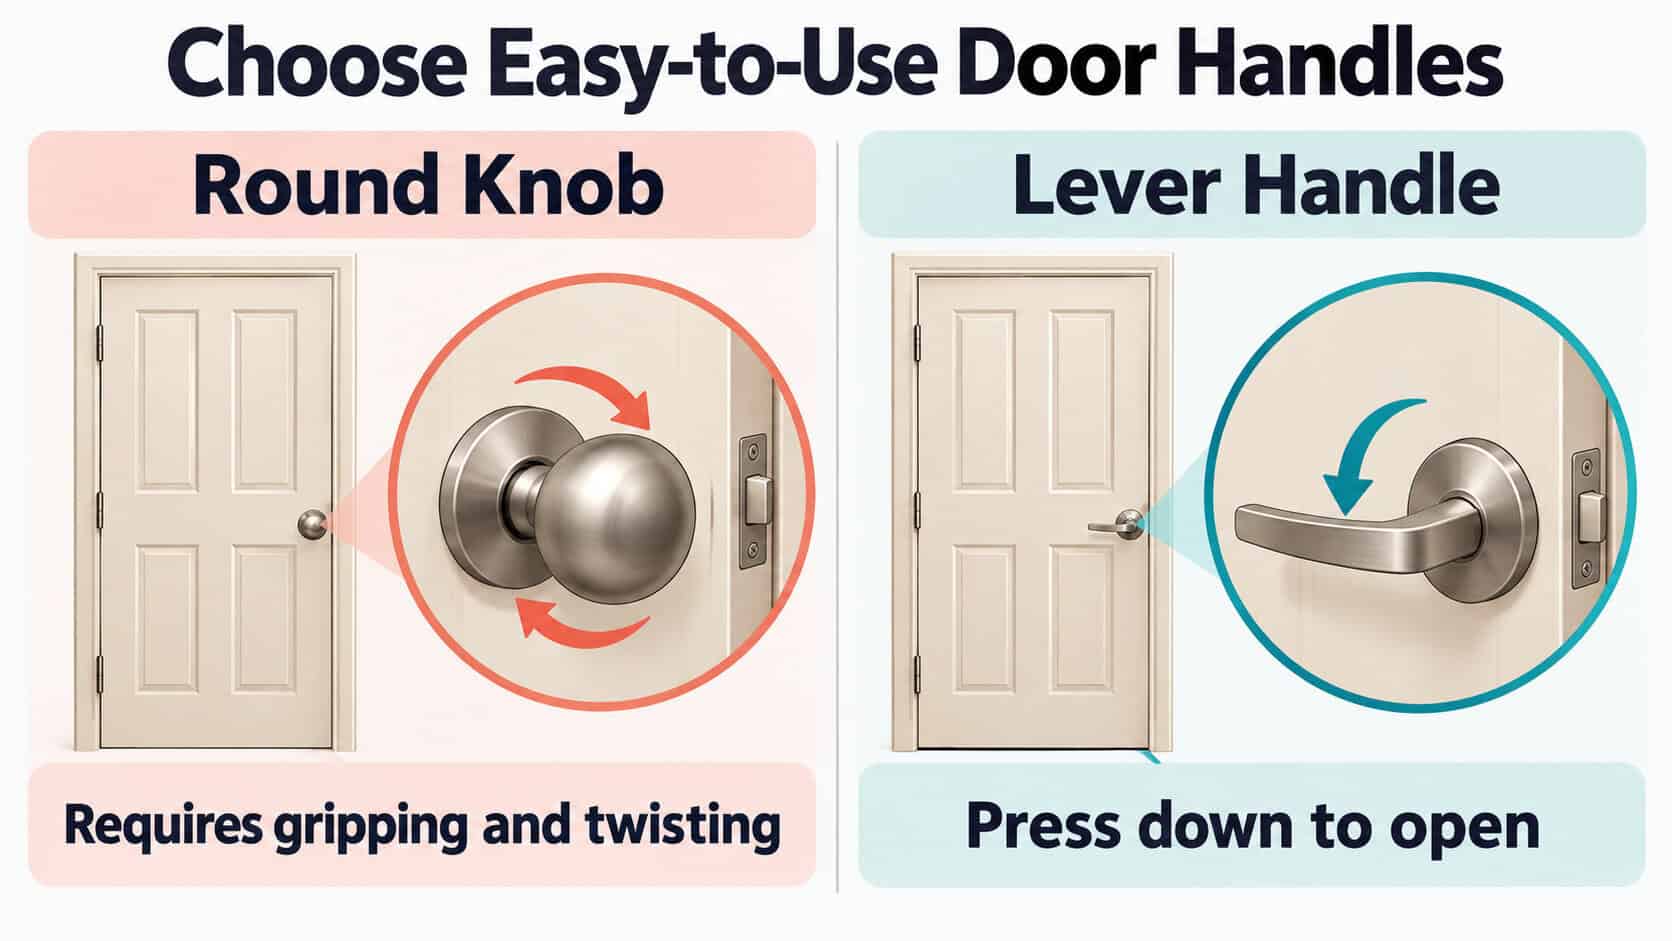
Consider lever door handles, single-lever faucets, and easy-to-operate cabinet pulls.
Let the future resident try the hardware when possible.
A feature that looks convenient may not feel comfortable in their hands.
Place switches, the thermostat, and outlets where furniture will not block access. Think about reaching them from both standing and seated positions.
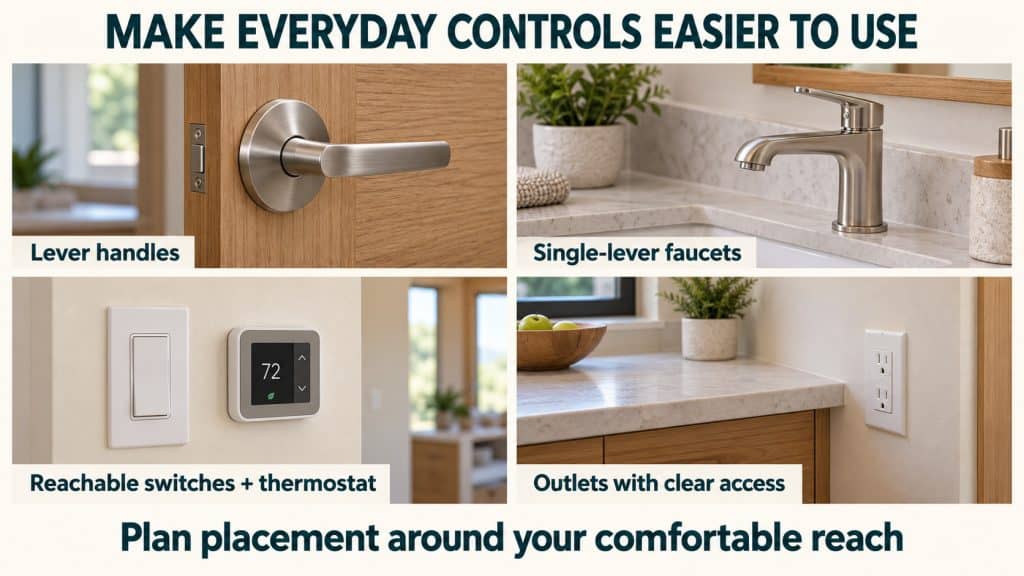
A conveniently placed outlet can reduce the need to bend behind a sofa or crawl beneath a desk.
For laundry, check the entire task.
Can the resident reach the controls, open the doors, load the machines, and move clothes to a sorting surface?
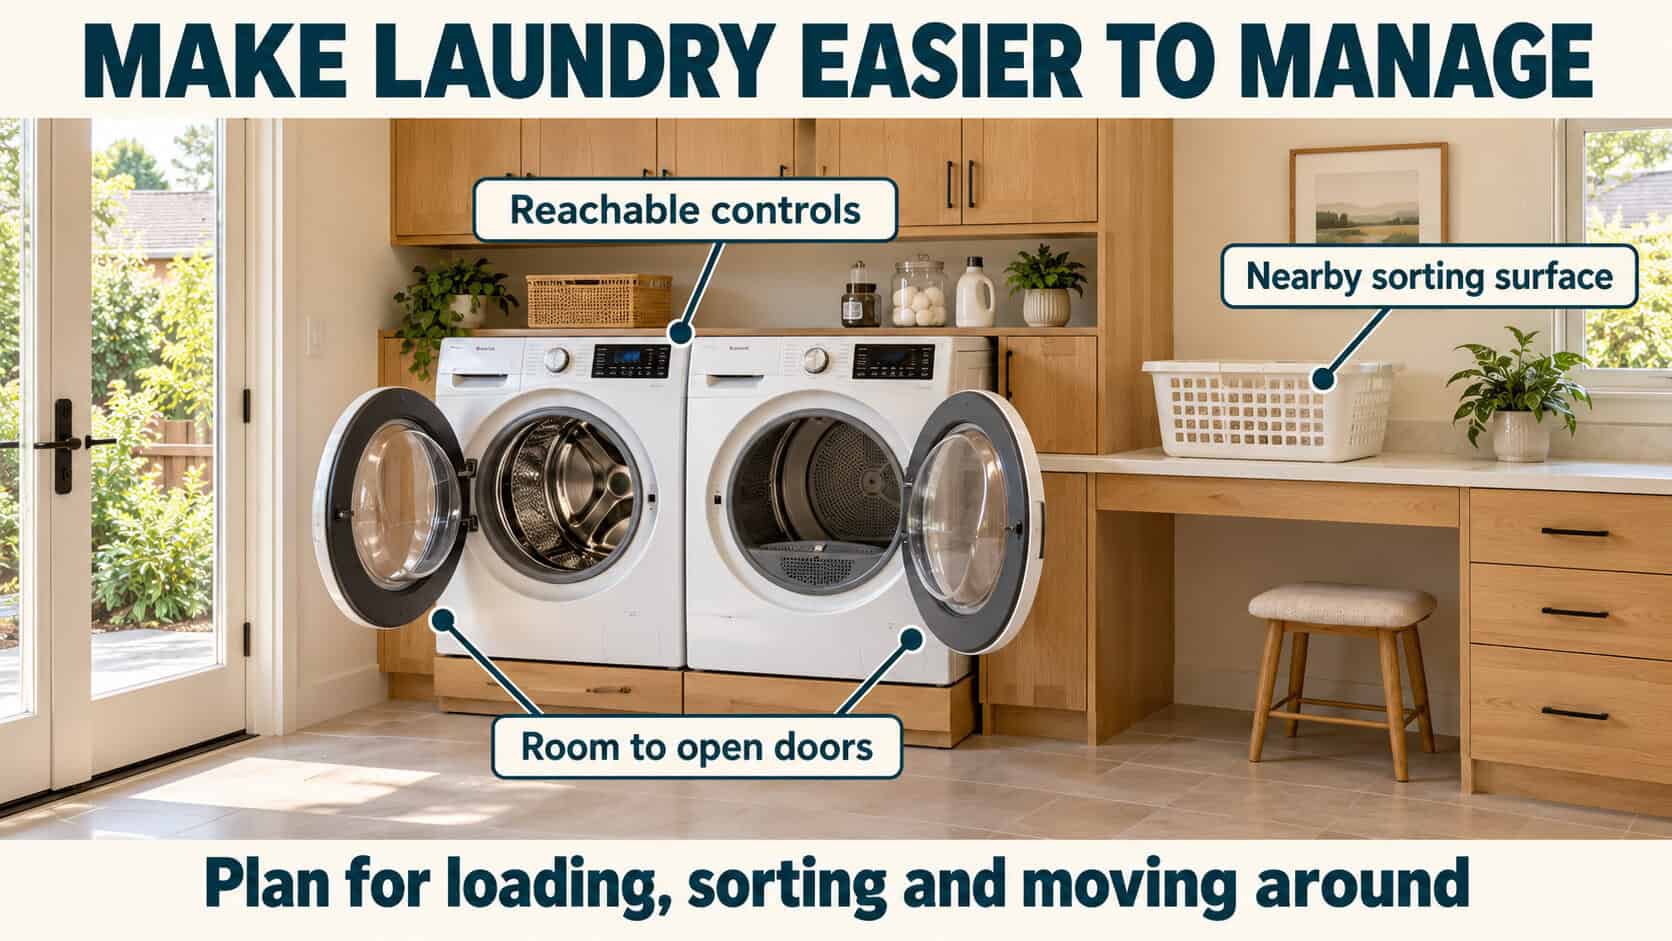
Side-by-side machines may keep controls more reachable than a stacked arrangement, but the best choice depends on the person and available space.
Raising front-loading machines can reduce bending for some users while making other parts harder to reach.
Include somewhere nearby to set down a basket. Leave enough room to use the machines with their doors open.
10. Leave Room for an Overnight Helper
Living near family can make support more convenient. There may still be times when someone needs to stay inside the ADU overnight.
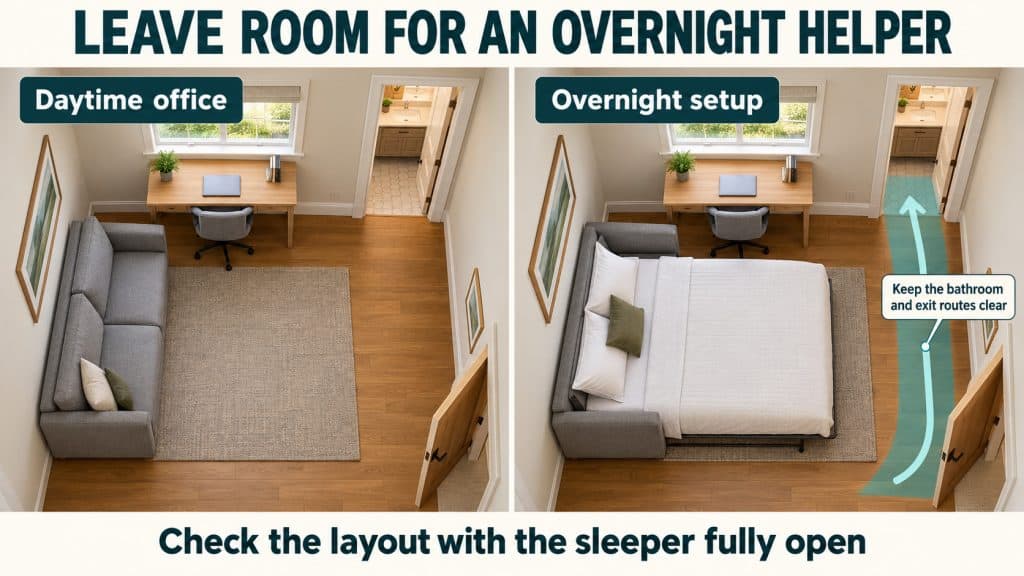
A separate guest bedroom is one option, but it is not the only one.
A flexible office or living area with a sleeper sofa may work for occasional help during recovery or a short family visit.
Check the layout with the sleeper fully open. Can both people reach the bathroom? Does the bed block the exit or make it difficult to move through the room?
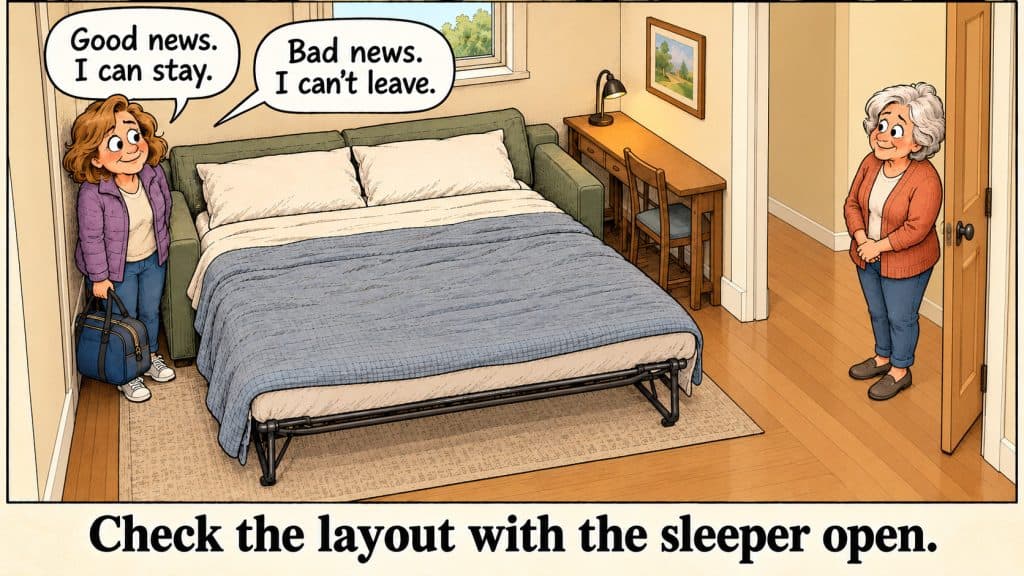
Also consider privacy and how often the space may be needed. A sleeper sofa that works for a few nights may be a poor fit for ongoing overnight care. Let the expected use guide the decision.
Final Thoughts on ADU Design Ideas for Aging in Place
Before approving your ADU floor plan, walk through a normal day on paper. Getting inside.
Preparing breakfast. Taking a shower. Doing laundry. Getting up at night.
Then consider how those routines might change with a temporary injury, a mobility device, or someone helping.
Start with the person who will live there. Bring their needs and routines into the ADU planning process, and have the designer check the clearances and construction details that support them.
Planning and preparing to accommodate multiple mobility needs is so much cheaper on the front end.
Frequently Asked Questions
What features should an ADU for aging parents include?
Prioritize one-level living, easy entry, clear pathways, reachable storage, and a usable bathroom. Tailor the layout to your parent’s routines and needs.
Can a small ADU work for aging in place?
Yes, with thoughtful planning. Furniture placement, doorway approaches, and bathroom clearance matter as much as the home’s total square footage.
Should I include aging-in-place features if I don’t need them yet?
Planning ahead can preserve options. Consider wall reinforcement for grab bars, clear pathways, and adaptable layouts before construction.
Author

Image Source: Canva, Pexels, Pixabay, Open Verse, Unsplash